
Biskoui is a Swiss solution dedicated to the management of third-party services and cookies that aims to make your website compliant with data protection regulations, such as nFADP (New Federal Act on Data Protection) in Switzerland and GDPR (General Data Protection Regulation) in Europe.
Here’s how to install the biskoui consent banner on your Wix CMS website.
1. Create an account on biskoui.ch
Before you start, go to admin.biskoui.ch and create an account if you haven’t already done so. Biskoui is available under a free plan.
Once your account has been created:
- Create your domain
- Configure your banner
- Add your consent services (e.g. Google Analytics, YouTube, etc.)
- Go to the Dashboard tab and click on Manual installation
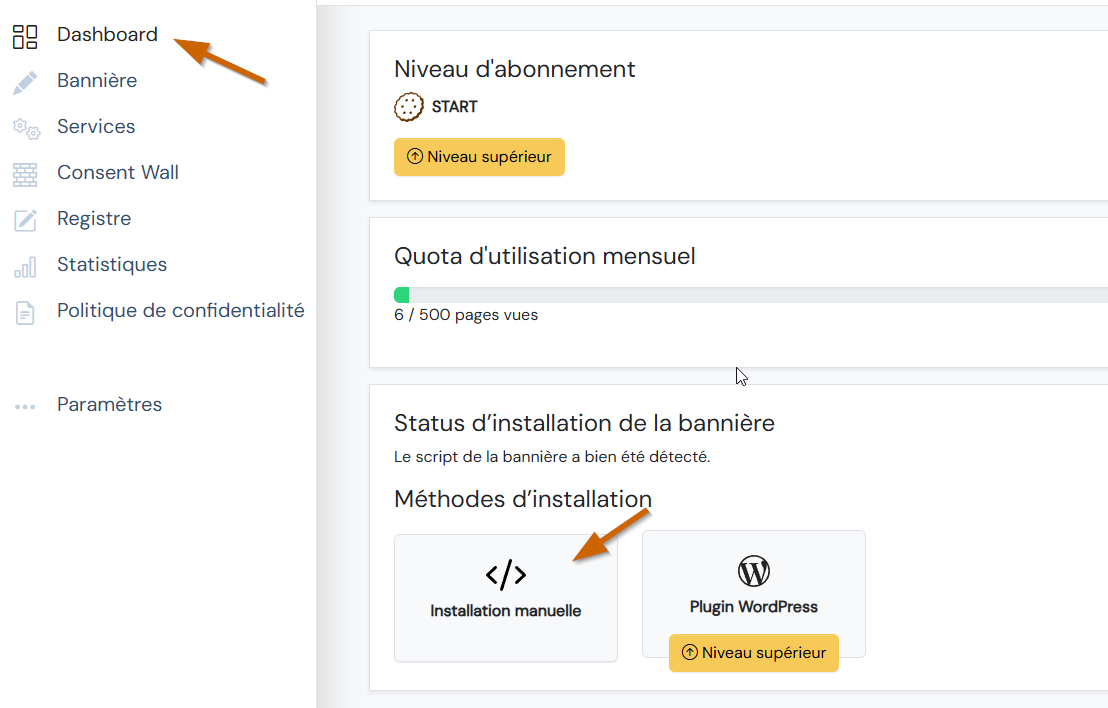
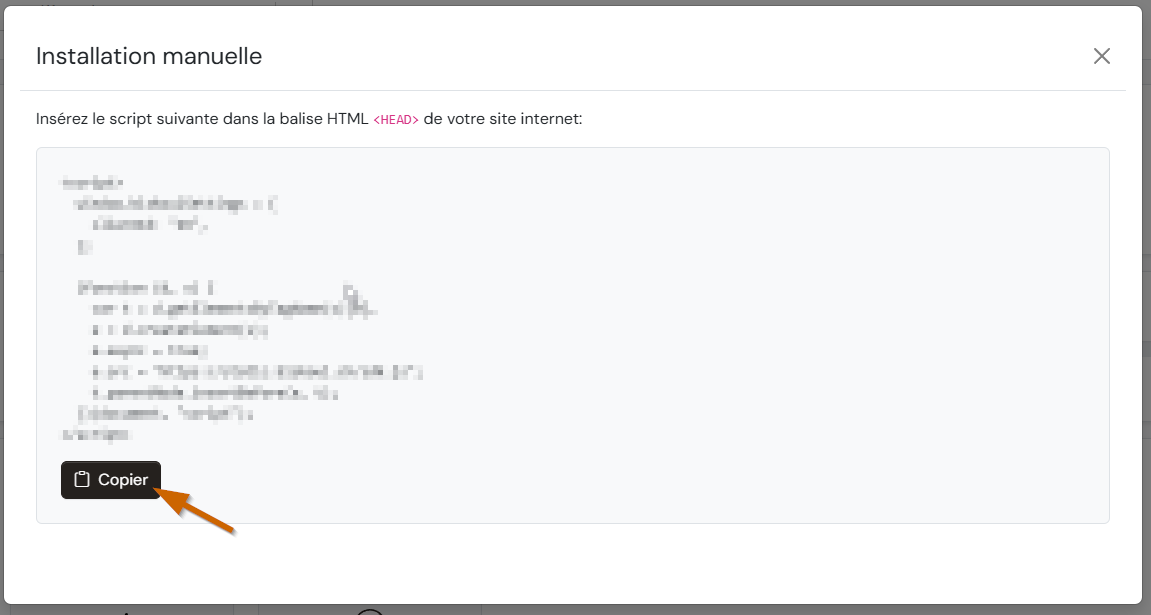
- Then click the Copy button to save the installation script to your clipboard
- The rest will take place on Wix
2. Add the banner to your Wix site
- Log in to your Wix account
- Open your site editor (in the Wix dashboard)
- Go to Settings > Company information
- Scroll down, then click on Add a custom code
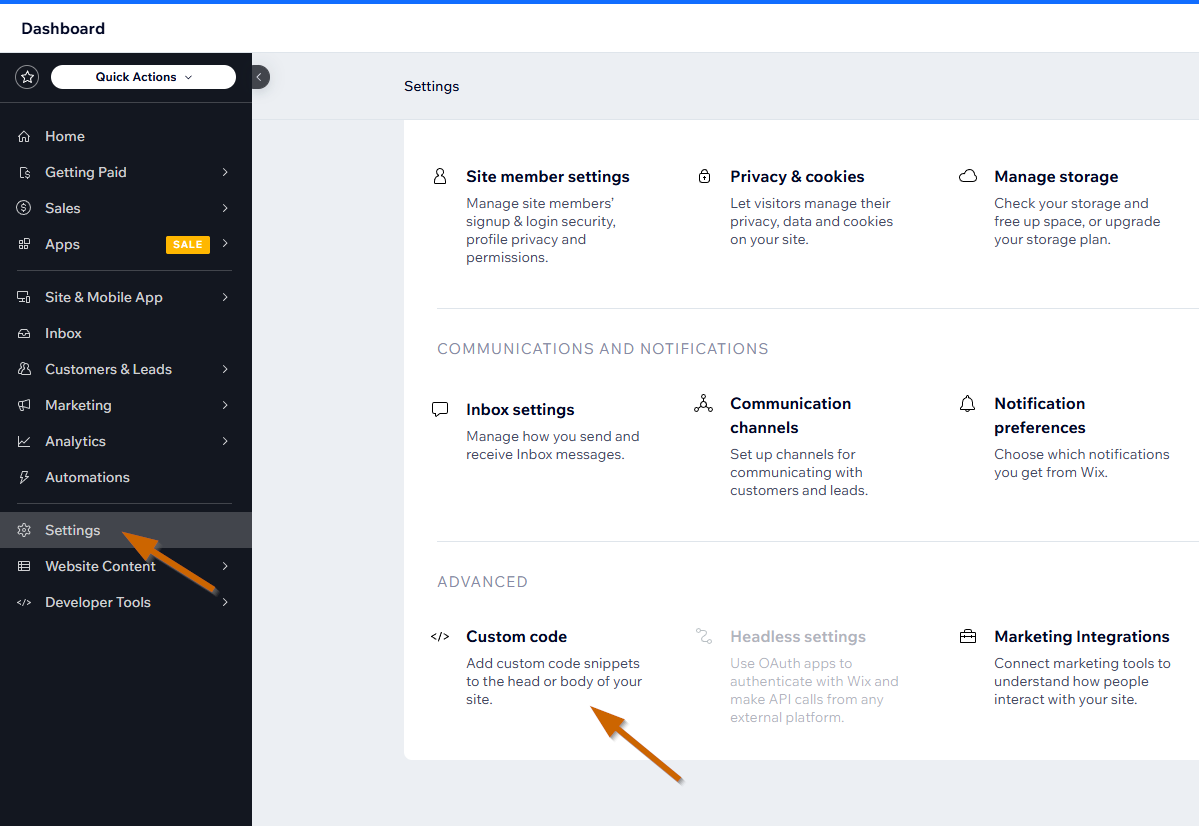
- Click on the Add custom code button
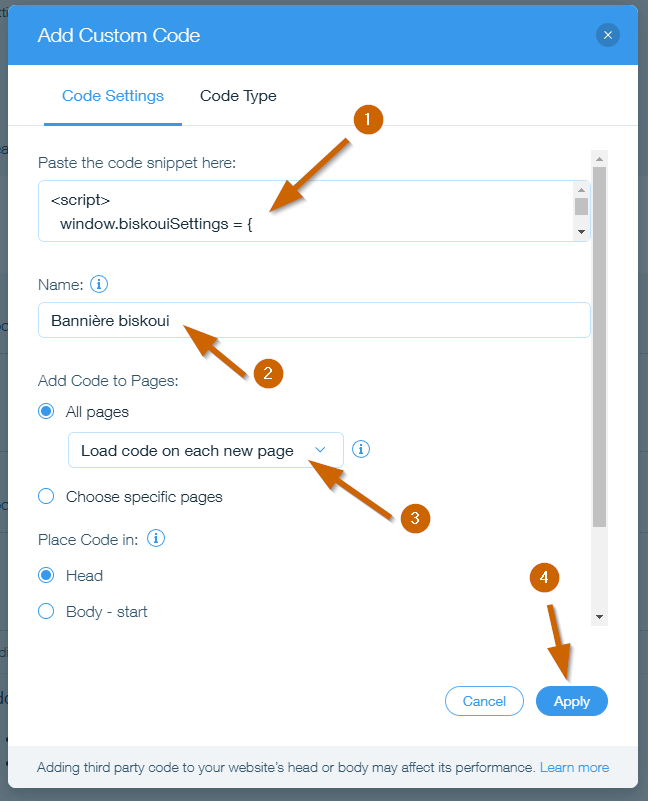
- In the new window that appears, configure as follows:
- Paste the previously copied biskoui code
- Enter the name “biskoui Banner” to easily understand the purpose of the code
- Select the Download code on each new page option
- Click on Apply in the bottom right-hand corner
- Special case: If your site is connected to several domains, an additional list allows you to choose the domain on which the script will be installed. Make sure you choose the main domain for your site.
Check installation
Visit your website from a new browser tab. When the page loads, the biskoui consent banner should now be displayed.
Need help with installation?
Our support team is available at support@biskoui.ch