Introduction

This article is a guide on how to integrate a service via Google Tag Manager (GTM).

Prerequisites

  • The GTM tag must already be installed on your website.

Creating the trigger

Please note that you will need to repeat the following steps for each services you want to install via Google Tag Manager.

  1. Log into the biskoui console (https://admin.biskoui.ch)
  2. Navigate to the Services tab and click Add a service
    Instructions screenshot for the integration of biskoui consent management platform with Google Tag Manager
  3.  Search for the service you would like to add
  4. Once the service selected, in the drop down menu under Intergration mode, select Google Tag Manager (GTM)
    Instructions screenshot for the integration of biskoui consent management platform with Google Tag Manager
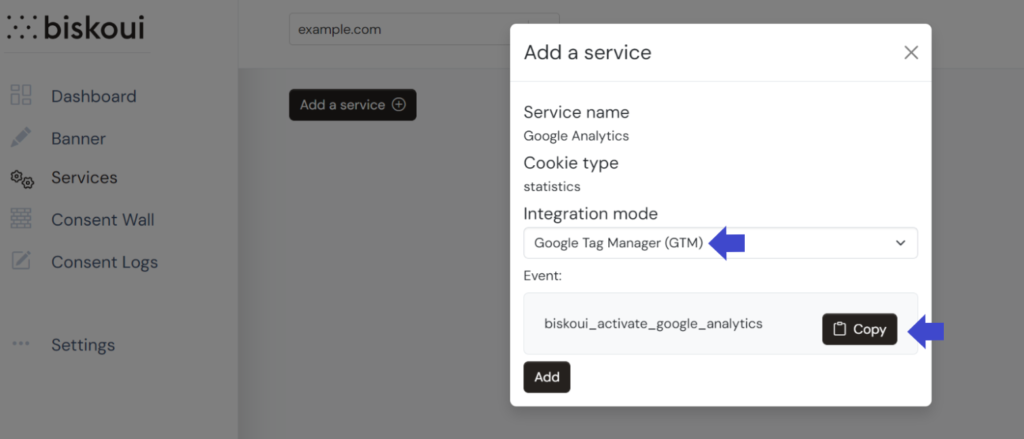
  5. Copy the event to your clipboard using the Copy button
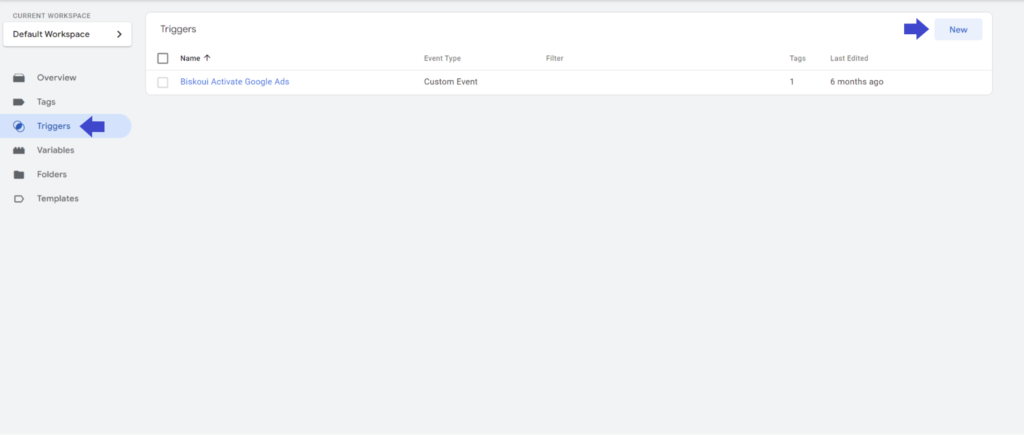
  6. Open your Google Tag Manager console (https://tagmanager.google.com)
  7. Go to the Triggers menu and click New button
    Instructions screenshot for the integration of biskoui consent management platform with Google Tag Manager
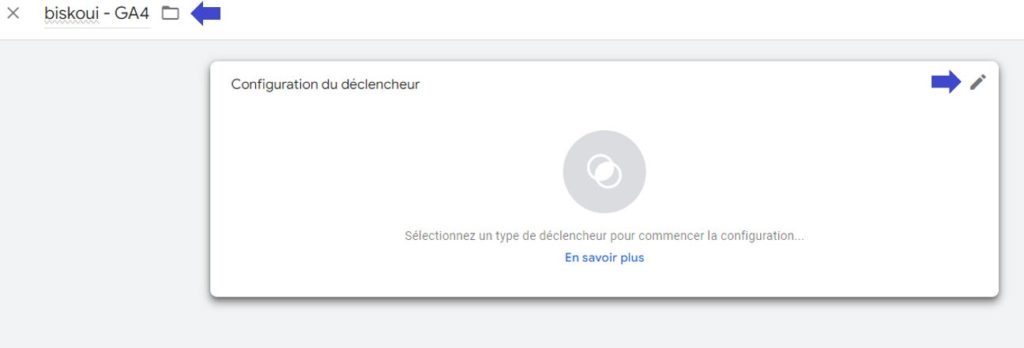
  8. Type the name of your choice for the trigger and click on the edit icon
    Instructions screenshot for the integration of biskoui consent management platform with Google Tag Manager
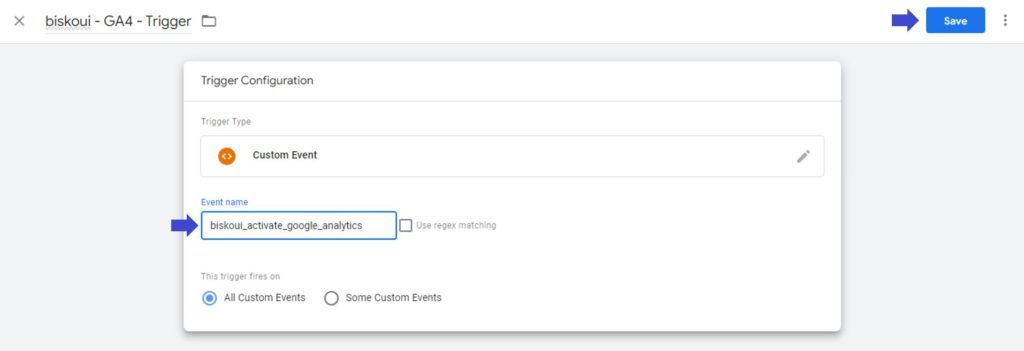
  9. Select the Custom event trigger type (further down in the list)
    Instructions screenshot for the integration of biskoui consent management platform with Google Tag Manager
  10. Paste the previously copied trigger from the biskoui admin console and click the Save button
    Instructions screenshot for the integration of biskoui consent management platform with Google Tag Manager

Creating the tag and selecting the trigger

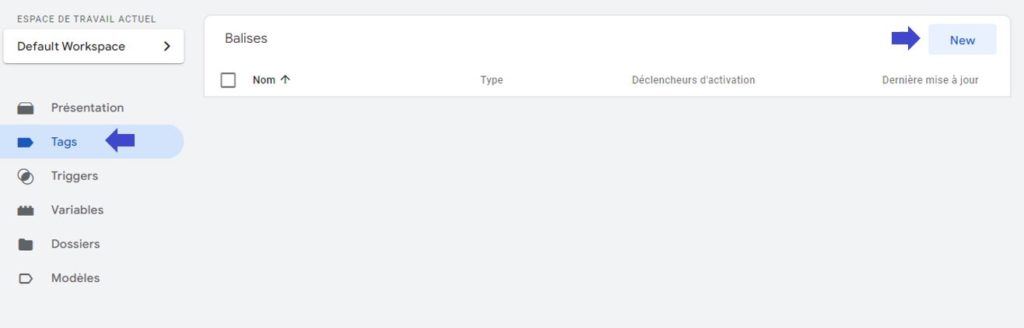
  1. Go to the Tags menu and click New button
    Instructions screenshot for the integration of biskoui consent management platform with Google Tag Manager
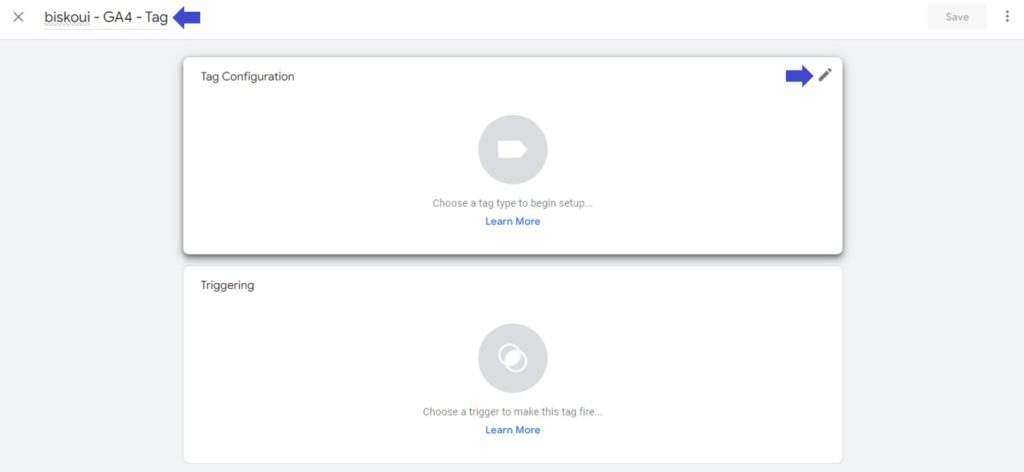
  2.  Type the name of your choice for the Tag and click on the edit icon on the Tag Configuration box
    Instructions screenshot for the integration of biskoui consent management platform with Google Tag Manager
  3. In the list, find the service you want to add, if the service is not part of Google Tag Manager’s pre-built list, choose Custom HTML instead and paste your the script that was provided by your service.
  4. Once the tag configured, set the trigger by clicking on the edit icon in the Triggering box (the screenshot below show an example based on a Custom HTML tag)
    Instructions screenshot for the integration of biskoui consent management platform with Google Tag Manager
  5. Select the trigger you have just created and click on the Save button

Congratulations! You have successfully created a service that is managed through Google Tag Manager. If you wish to add more services, you will need to repeat this procedure for each services you create.

Need help with your Google Tag Manager integrations?

Our support team is available at support@biskoui.ch